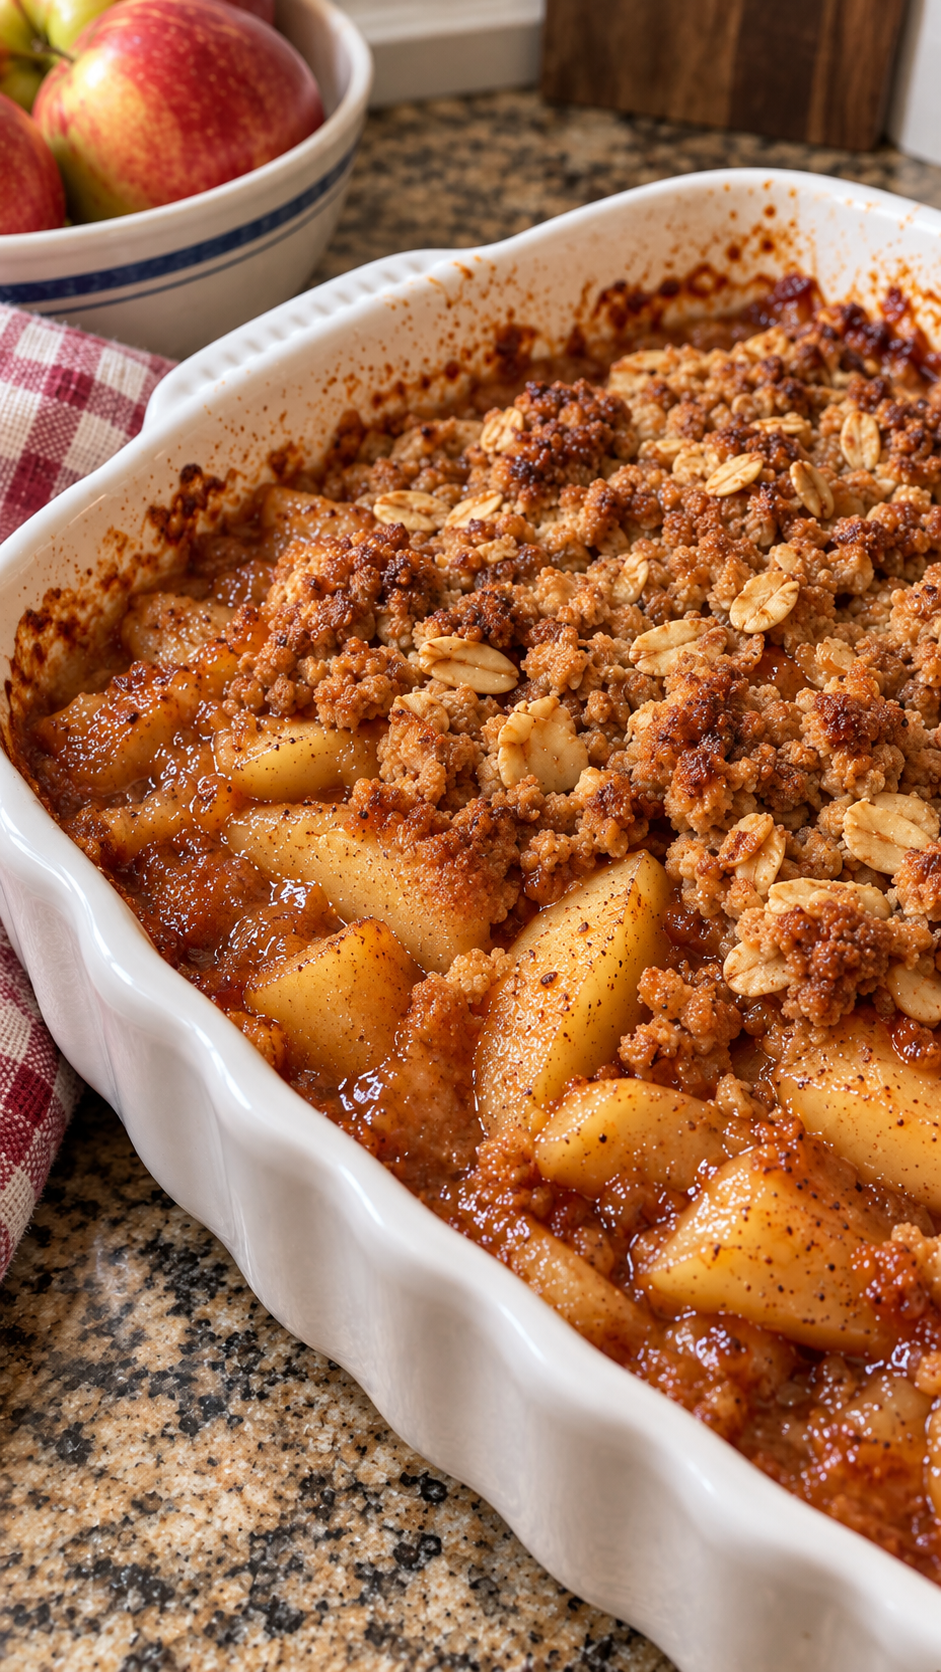
Some desserts just feel like fall. This
Homemade Apple Crisp is one of them. Tender cinnamon apples bake under a buttery, golden oat topping until the filling is bubbling and the topping is crispy — and the result is pure, cozy comfort.
It’s the kind of dessert that’s simple enough for a weeknight but special enough for a holiday table. The apples become soft and sweet, the cinnamon adds warmth, and the oat topping provides the perfect crunchy contrast. Serve it warm with a scoop of vanilla ice cream, and you have a dessert that everyone will love.
Prep takes 15 minutes, it bakes in 40 to 50 minutes, and it serves 6 to 8. Perfect for cozy family evenings, potlucks, or anytime you want a warm, comforting dessert.
Recipe Card
Homemade Apple Crisp 🍎
Tender cinnamon apples under a buttery, golden oat topping—an easy dessert for cozy family evenings.
Prep: 15 minutes |
Bake: 40–50 minutes
Servings: 6–8
For the apples
- 6 medium apples, peeled, cored, and thinly sliced
- ½ cup granulated sugar
- 1 teaspoon ground cinnamon
For the topping
- 1 cup old-fashioned rolled oats
- ½ cup all-purpose flour
- ½ cup packed brown sugar
- ½ cup cold butter, cubed
Instructions
- Preheat the oven to 350°F (175°C). Grease a 9-inch square or similar 2-quart baking dish.
- Toss the sliced apples with the granulated sugar and cinnamon. Spread evenly in the dish.
- Mix the oats, flour, and brown sugar in a bowl. Work in the cold butter with a pastry cutter or your fingertips until crumbly, leaving some larger clusters.
- Sprinkle the topping evenly over the apples.
- Bake for 40–50 minutes, until the filling bubbles, the topping is golden, and a knife slides easily into the apples. Loosely cover with foil if the topping browns too quickly.
- Let rest for 10–15 minutes before serving.
Why This Recipe Works
The apples become tender and sweet as they bake. Slicing the apples thinly ensures they cook through and become soft and tender, while the granulated sugar and cinnamon infuse them with warmth and sweetness.
The cinnamon is the classic apple pairing. A teaspoon of ground cinnamon brings warmth and depth to the apples, making the filling taste like a proper apple pie.
The oat topping is the star of the show. Old-fashioned rolled oats, flour, brown sugar, and cold butter come together to create a buttery, golden, crumbly topping that’s crispy on top and slightly chewy underneath.
Cold butter is the secret to a crumbly topping. Working cold butter into the dry ingredients creates small pockets of butter that melt as the crisp bakes, resulting in a crispy, crumbly topping. If the butter is too warm, the topping will be dense and greasy.
Leaving some larger clusters adds texture. A mix of fine crumbs and larger clusters creates a topping with both crispy and chewy textures — the perfect contrast to the soft apples.
The filling bubbles up around the edges as it bakes. This is a sign that the apples are cooked and the sugars have caramelized. It’s the moment the crisp goes from good to great.
Letting the crisp rest before serving allows the filling to set. It also prevents you from burning your mouth on molten apple filling. Ten to fifteen minutes of rest is the sweet spot.
It’s a complete dessert with just a handful of ingredients. Apples, sugar, cinnamon, oats, flour, brown sugar, and butter. Simple ingredients that come together into something extraordinary.
Pro Tips for Perfect Results Every Time
Use firm, baking-friendly apples. Granny Smith, Honeycrisp, Braeburn, or Fuji apples all work beautifully. They hold their shape and provide a good balance of sweet and tart.
Slice the apples thinly and evenly. Even slices cook at the same rate, so every bite is tender. Aim for slices about ¼ inch thick.
Toss the apples with the sugar and cinnamon until evenly coated. This ensures every slice is seasoned and sweetened.
Spread the apples evenly in the baking dish. An even layer ensures even baking and consistent texture.
Use cold butter for the topping. Cold butter creates a crumbly, crispy topping. If the butter is too warm, the topping will be dense and greasy.
Work the butter in with a pastry cutter or your fingertips. A pastry cutter makes quick work of this, but your fingertips work just as well. Stop when the mixture is crumbly, with some larger clusters remaining.
Don’t overwork the topping. Overworking the butter will make the topping dense and greasy. Stop when the mixture is crumbly.
Sprinkle the topping evenly over the apples. An even layer ensures every bite gets some of that buttery, golden topping.
Bake until the filling bubbles and the topping is golden. This is the sign that the crisp is done. A knife should slide easily into the apples.
Loosely cover with foil if the topping browns too quickly. This protects the topping while the apples finish cooking.
Let the crisp rest for 10–15 minutes before serving. This allows the filling to set and makes the crisp easier to serve.
Serve warm with vanilla ice cream. The contrast of warm, cinnamon-spiced apples and cold, creamy ice cream is the perfect pairing.
Variations and Substitutions
Use a different fruit. Pears, peaches, or a mix of berries can be substituted for the apples. Adjust the sugar and cinnamon to taste.
Add nuts to the topping. Chopped pecans, walnuts, or almonds can be added to the topping for extra crunch and flavor.
Add dried fruit. Dried cranberries or raisins can be mixed into the apples for extra sweetness and chew.
Add a caramel drizzle. A drizzle of caramel sauce over the finished crisp adds a sweet, buttery finish.
Make it a gluten-free version. Use a 1-to-1 gluten-free all-purpose flour blend and gluten-free oats in place of the regular flour and oats.
Make it dairy-free. Use dairy-free butter or coconut oil in place of the regular butter.
Make it a vegan version. Use dairy-free butter or coconut oil and verify that all other ingredients are vegan.
Make it a spiced version. Add a pinch of nutmeg, cloves, or allspice to the apples for a warmer, more complex spice profile.
Make it a crumble. Substitute the oats with more flour and butter for a classic crumble topping.
Make it a single-serve version. Divide the filling and topping among ramekins and bake for 20–25 minutes for individual servings.
Storage and Reheating
Refrigerator: Store cooled crisp in an airtight container in the refrigerator for up to 4 days.
Reheating: The best way to reheat is in a 350°F (175°C) oven for 15–20 minutes, until warm and crispy. You can also reheat individual portions in the microwave for 30–45 seconds.
Freezer: This crisp freezes reasonably well. Cool completely, transfer to freezer-safe containers, and freeze for up to 3 months. Thaw overnight in the refrigerator, then reheat in a 350°F (175°C) oven until warm.
Make ahead: You can assemble the crisp up to 24 hours in advance, cover tightly, and refrigerate. Bake as directed, adding 5–10 minutes to the bake time since it starts cold.
Food safety: Since this crisp contains fruit and dairy, don’t leave it at room temperature for more than 2 hours. Refrigerate leftovers promptly.
What to Serve With It
This crisp is delicious on its own, but a few accompaniments take it to the next level:
- A scoop of vanilla ice cream — the classic pairing
- A dollop of whipped cream for extra indulgence
- A drizzle of caramel sauce for a sweet, buttery finish
- A cup of hot coffee or tea for an afternoon treat
- A glass of cold milk
- Fresh whipped cream with a pinch of cinnamon
Frequently Asked Questions
Can I use a different type of apple?
Yes. Granny Smith, Honeycrisp, Braeburn, or Fuji apples all work beautifully. They hold their shape and provide a good balance of sweet and tart.
Do I have to peel the apples?
Peeling is optional. If you leave the skins on, the crisp will have a slightly different texture, but it will still be delicious.
Why did my topping turn out dense?
The butter was too warm, or the topping was overworked. Use cold butter and work it in gently until crumbly.
Why did my topping burn?
The oven temperature was too high, or the crisp baked too long. Loosely cover the crisp with foil if the topping is browning too quickly.
Can I make this ahead of time?
Yes. Assemble the crisp up to 24 hours in advance, cover tightly, and refrigerate. Bake as directed, adding 5–10 minutes to the bake time.
Can I freeze this crisp?
Yes, for up to 3 months. Cool completely, transfer to freezer-safe containers, and freeze. Thaw overnight in the refrigerator, then reheat in a 350°F (175°C) oven until warm.
Can I make this gluten-free?
Yes. Use a 1-to-1 gluten-free all-purpose flour blend and gluten-free oats in place of the regular flour and oats.
Can I make this dairy-free?
Yes. Use dairy-free butter or coconut oil in place of the regular butter.
Can I add nuts?
Yes. Chopped pecans, walnuts, or almonds can be added to the topping for extra crunch and flavor.
How long does this last in the refrigerator?
Up to 4 days in an airtight container. Reheat in the oven for the best texture.
Can I make this in a different pan size?
Yes. Use a 9×13-inch pan for a thinner crisp or a 9-inch square pan for a thicker one. Adjust the bake time as needed.
Can I double this recipe?
Yes. Use two baking dishes and divide the ingredients evenly. Bake both, rotating them halfway through if needed.
Final Thoughts
This
Homemade Apple Crisp is everything a comforting dessert should be: tender cinnamon apples, a buttery golden oat topping, and a warm, cozy flavor that makes every bite feel like home. It’s simple, it’s satisfying, and it’s the kind of dessert that brings everyone to the table.
It’s perfect for cozy family evenings, potlucks, or anytime you want a warm, comforting dessert. Serve it with a scoop of vanilla ice cream, and watch it disappear.
If you make this crisp, I’d love to hear how it turned out. Did you add nuts? Use a different fruit? Try a caramel drizzle? Drop a comment below and let me know — and if you’re planning to make it, save this recipe for your next cozy dessert night.