Grandma Louise’s Frozen Fruit Salad – The Sweet, Creamy Potluck Classic Everyone Fights Over
There’s something magical about a dessert that vanishes before the coffee even finishes brewing. Grandma Louise’s Frozen Fruit Salad is exactly that kind of recipe—sweet, creamy, fluffy, and irresistibly nostalgic. It’s the pan that shows up at church suppers, Easter dinners, and summer potlucks… and disappears first.
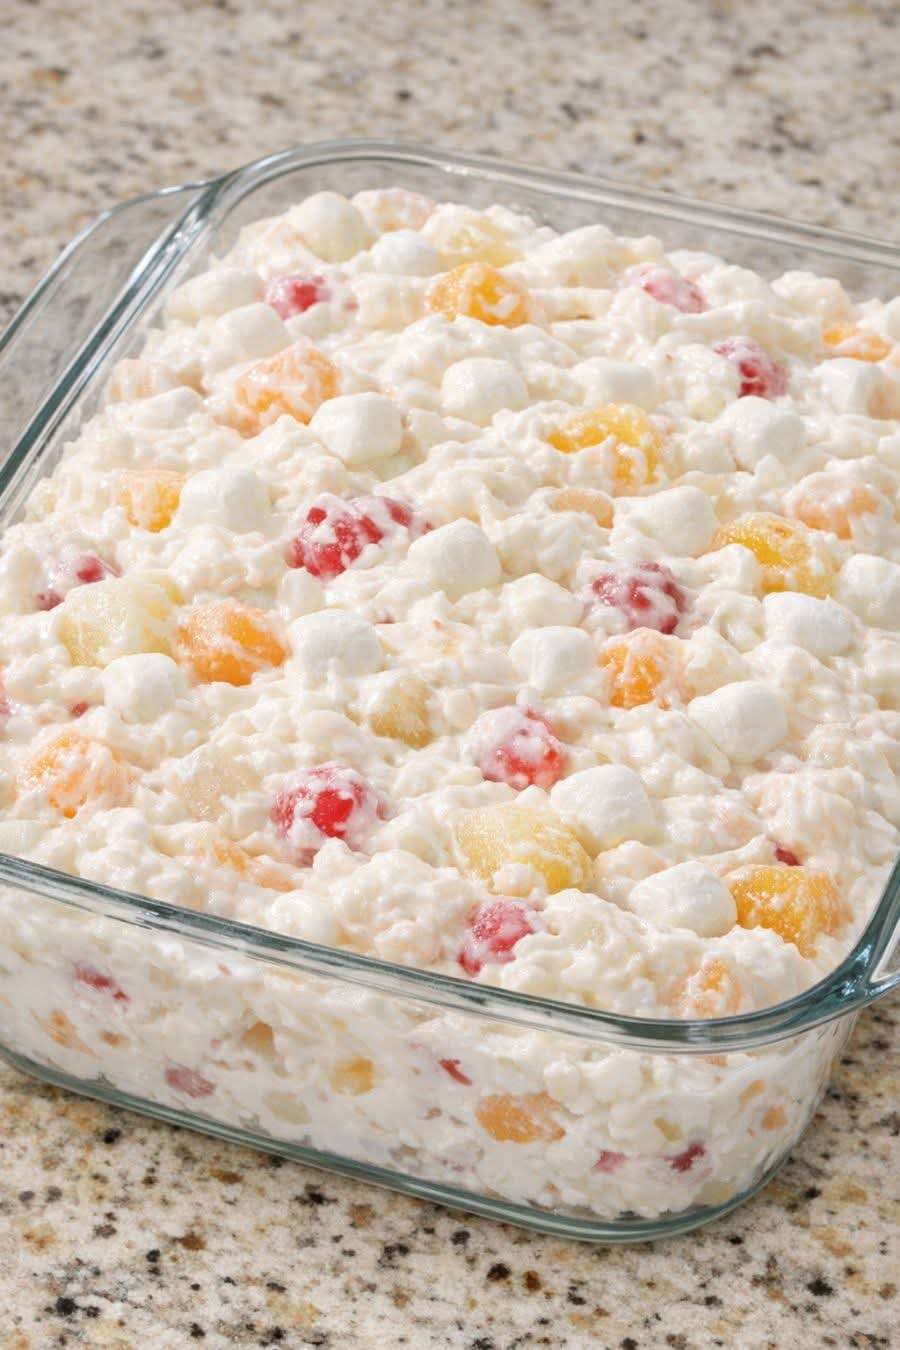
This isn’t just another fruit salad. It’s a dreamy, sliceable dessert that lands somewhere between ice cream, marshmallow fluff, and old-fashioned ambrosia. Made with pantry staples like canned fruit cocktail, sour cream, and mini marshmallows, it transforms into a frozen treat with a texture that’s rich yet airy. Best of all? It’s make-ahead, budget-friendly, and practically foolproof.
If you’re searching for the best frozen fruit salad recipe, the one that tastes like childhood and cuts into perfect squares, you’ve found it.
Why This Frozen Fruit Salad Recipe Is So Loved
✔ No baking required
✔ Made with simple pantry staples
✔ Perfect make-ahead dessert
✔ Budget-friendly for large gatherings
✔ Creamy, fluffy texture with bursts of fruit
✔ Easy to slice or scoop for serving
It’s the ultimate Midwestern potluck dessert—simple, nostalgic, and guaranteed to spark compliments.
Ingredients (And Why Each One Matters)
Understanding the role of each ingredient ensures the perfect texture and flavor balance.
1. Canned Fruit Cocktail (2 cans, 15 oz each, well drained)
The colorful heart of the salad. It provides sweetness, texture, and those familiar little fruit gems. Draining thoroughly is crucial—too much syrup creates ice crystals instead of creaminess.
2. Full-Fat Sour Cream (1 cup)
This is the secret weapon. Sour cream adds richness and tang, balancing the sweetness and creating that smooth, creamy base. Full-fat yields the best frozen texture.
3. Whipped Topping or Fresh Whipped Cream (1 cup)
Adds lightness and structure. It keeps the salad fluffy rather than dense and helps it freeze into a soft, sliceable consistency.
4. Mini Marshmallows (2 cups)
Classic potluck charm. Marshmallows bring sweetness and a soft, chewy texture that contrasts beautifully with the frozen cream.
5. Maraschino Cherries (1/3 cup, optional but traditional)
These add vibrant color and a nostalgic pop of sweetness. Patting them dry prevents excess moisture.
6. Maraschino Cherry Juice (2 tablespoons, optional)
Enhances color and flavor, giving the mixture a subtle pink hue.
7. Granulated Sugar (2 tablespoons, or to taste)
Adjusts sweetness depending on your preference and the sweetness of the fruit.
8. Vanilla Extract (1 teaspoon)
Deepens flavor and rounds out the creamy base.
9. Pinch of Kosher Salt
A tiny but powerful addition—it balances sweetness and enhances overall flavor.
Step-by-Step Instructions for Perfect Results
Step 1: Prepare Your Dish
Place a 9×9-inch glass casserole dish on a level surface. Glass helps freeze evenly and makes slicing easier.
Step 2: Drain the Fruit Thoroughly
Pour fruit cocktail into a colander and let it sit several minutes. Shake gently to remove excess syrup.
Pro Tip: For extra insurance, spread the fruit on paper towels for 5 minutes.
Step 3: Prep the Cherries
Chop maraschino cherries into small pieces and pat dry with paper towels.
Step 4: Make the Creamy Base
In a large mixing bowl, whisk together:
Sour cream
Whipped topping
Sugar
Vanilla
Cherry juice (if using)
Pinch of salt
Whisk until completely smooth and fluffy.
Step 5: Fold in the Fruit
Gently fold the drained fruit cocktail and cherries into the cream mixture. Use a spatula and light motions to keep fruit intact.
Step 6: Add the Marshmallows
Fold in mini marshmallows until evenly distributed.
Step 7: Spread and Smooth
Transfer the mixture into the glass dish. Smooth the top evenly (a rustic swirl is perfectly charming).
Step 8: Freeze Until Firm
Cover tightly with plastic wrap or foil. Freeze for at least 4 hours, preferably overnight for best texture.
Step 9: Serve Like a Pro
Let sit at room temperature for 10–15 minutes before slicing.
Dip a sharp knife in warm water and wipe dry between cuts for clean squares.
Pro Tips for the Best Frozen Fruit Salad
⭐ Drain everything thoroughly to avoid iciness.
⭐ Use full-fat dairy for the creamiest texture.
⭐ Freeze overnight for clean, picture-perfect slices.
⭐ For softer texture, chill in the refrigerator instead of fully freezing.
⭐ Add toasted pecans or shredded coconut for extra texture.
⭐ Want more color? Add well-drained crushed pineapple or thawed strawberries.
Delicious Variations
Lightened-Up Version: Swap half the sour cream with plain Greek yogurt.
Extra Sweet & Classic: Use non-dairy whipped topping and add an extra tablespoon of sugar.
Ambrosia-Inspired: Add ½ cup shredded coconut and ½ cup toasted pecans.
Potluck Bars: Freeze in a 9×13 dish for thinner, easier-to-hold squares.
Individual Servings: Freeze in muffin liners for grab-and-go portions.
Serving Suggestions
This creamy frozen fruit salad pairs beautifully with:
Baked ham
Roast chicken
Classic casseroles
Holiday spreads
Easter brunch menus
Serve alongside hot coffee or tea—the contrast of warm sips and icy, creamy bites makes it unforgettable.
For a dressed-up presentation, top with:
Fresh whipped cream
Toasted coconut
Chopped nuts
A single maraschino cherry
Storage Tips
Keep tightly covered in the freezer for up to 1–2 weeks.
Though honestly? It rarely lasts more than a day.
Final Thoughts: A Simple Dessert That Always Steals the Show
Grandma Louise knew what she was doing. This Frozen Fruit Salad recipe proves that you don’t need complicated techniques or expensive ingredients to create a dessert everyone loves. With just a handful of pantry staples and a few minutes of mixing, you get a creamy, fluffy, sliceable potluck classic that tastes like tradition.
It’s nostalgic. It’s effortless. It’s irresistibly good.
If you’re looking for a make-ahead dessert that’s affordable, crowd-pleasing, and beautifully simple, this is the one that will earn you recipe requests every single time.
And just like Grandma Louise’s pan at the potluck… it won’t last long.