There’s a reason apple crisp has been a beloved dessert for generations. It combines the nostalgic comfort of sweet, spiced baked apples with the irresistible texture of a buttery, crunchy oat topping—all without the fuss of a pie crust. This classic version strikes the perfect balance between tart and sweet, soft and crisp. It’s a humble yet deeply satisfying dessert that turns simple ingredients into something magical, especially when served warm from the oven with a melting scoop of vanilla ice cream. This recipe provides clear, tested steps to ensure your crisp is a guaranteed success every time.
The Foundation: Choosing Your Apples
The single most important decision for a great apple crisp is your choice of apple. The right variety holds its shape during baking and provides a complex flavor that balances the sweet topping.
For the best results, use a mix of two different types of apples. This creates a more interesting flavor and better texture. Aim for a combination of one tart variety and one sweet or firm variety:
-
For Structure & Tartness: Granny Smith is the gold standard. Its firm flesh holds up perfectly, and its bright tartness cuts through the sweetness of the filling and topping.
-
For Complex Sweetness & Aroma:Honeycrisp, Braeburn, or Fuji are excellent choices. They offer a sweeter, more floral note and also maintain their shape well.
Avoid apples like Red Delicious or McIntosh, as they tend to become mushy and watery when baked. Peeling the apples is highly recommended, as the skins can separate during baking and create an unpleasant texture in the filling.
The Complete Classic Apple Crisp Recipe
Prep Time: 20 minutes | Cook Time: 40-45 minutes | Total Time: ~1 hour 5 minutes | Servings: 6-8
Ingredients
For the Apple Filling:
-
5–6 cups peeled, cored, and thinly sliced apples (about 5-6 medium apples)
-
⅓ cup (65g) granulated sugar
-
2 tablespoons all-purpose flour
-
1 tablespoon fresh lemon juice
-
1 teaspoon ground cinnamon
-
¼ teaspoon ground nutmeg
-
A pinch of salt
For the Crisp Topping:
-
1 cup (125g) all-purpose flour
-
1 cup (200g) packed light or dark brown sugar
-
½ cup (45g) old-fashioned rolled oats (do not use quick oats)
-
½ teaspoon baking powder
-
¼ teaspoon salt
-
½ cup (115g or 1 stick) cold unsalted butter, cut into small cubes
Step-by-Step Instructions
1. Prepare the Oven and Pan:
-
Preheat your oven to 375°F (190°C). This temperature is high enough to brown the topping and bubble the filling without burning.
-
Grease the inside of a 9-inch square baking dish, a 9-inch deep-dish pie plate, or a similar 2-quart oven-safe dish with a little butter or non-stick spray.
2. Make the Apple Filling:
-
In a large mixing bowl, combine the sliced apples, granulated sugar, 2 tablespoons of flour, lemon juice, cinnamon, nutmeg, and a pinch of salt.
-
Toss everything together until the apple slices are evenly and thoroughly coated. The flour and sugar will mix with the juices to create a delicious, lightly thickened sauce as it bakes.
-
Transfer the apple mixture to the prepared baking dish, spreading it into an even layer.
3. Create the Crisp Topping (The Key to Texture):
-
In a separate medium bowl, whisk together the 1 cup of flour, brown sugar, rolled oats, baking powder, and salt.
-
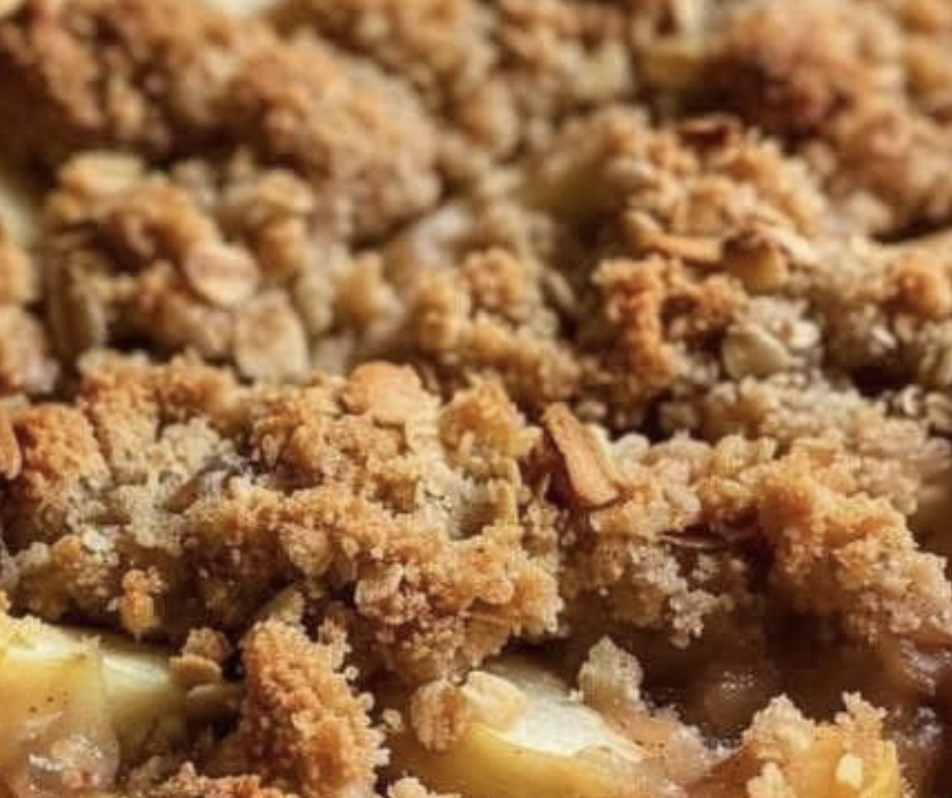
Add the cold, cubed butter. Using a pastry cutter, two forks, or your clean fingertips, work the butter into the dry ingredients. Stop when the mixture looks like coarse, uneven crumbs, with some pieces the size of small peas. Do not overmix until it forms a paste.Those visible bits of butter are what will melt and create the crisp, flaky pockets in your finished topping.
4. Assemble and Bake:
-
Sprinkle the crumb topping evenly over the apples, covering them completely. Do not press it down.
-
Place the dish in the preheated oven on the center rack. Bake for 40 to 45 minutes. The crisp is done when the topping is a deep, golden brown and the apple filling is visibly bubbling around the edges.
5. The Crucial Rest and Serving:
-
Remove the crisp from the oven and place it on a wire cooling rack. Let it rest for at least 15-20 minutes before serving. This rest time allows the bubbling, juicy filling to thicken slightly, so it doesn’t run all over the plate.
-
Serve warm in bowls, topped with a scoop of high-quality vanilla ice cream or a dollop of freshly whipped cream.
Pro Tips for the Perfect Crisp Every Time
-
Cold Butter is Non-Negotiable: For a truly crisp and flaky topping, your butter must be cold. If the butter melts before baking, the topping will spread and become greasy and dense. If your kitchen is warm, you can even chill the finished crumble mixture for 10 minutes before sprinkling it on.
-
Customize Your Spices: While cinnamon and nutmeg are classic, feel free to add a pinch of ground ginger, allspice, or cardamom for a more complex spice profile.
-
Add Texture and Flavor to the Topping:For extra crunch and flavor, mix ½ cup of chopped nuts (like pecans or walnuts) into the crumble topping before adding the butter.
-
Make it Ahead: You can prepare the apple filling and the crumb topping separately up to a day in advance. Store the filling covered in the refrigerator and the topping in a sealed bag in the fridge. Assemble and bake just before you want to serve it.
-
Storage and Reheating: Cover leftover crisp and store at room temperature for up to 2 days or in the refrigerator for up to 4 days. To reheat, place individual portions or the whole dish in a 300°F (150°C) oven for 10-15 minutes to restore the topping’s wonderful crunch. Microwaving will make it soggy.
Conclusion: More Than Just a Dessert
This Classic Apple Crisp is more than the sum of its parts. It’s a testament to the beauty of simple, honest cooking. The process is straightforward and forgiving, making it an ideal recipe for novice bakers and a trusted standby for seasoned cooks. It fills your home with an aroma that signals comfort and welcome. Ultimately, this dessert is about sharing—a warm, sweet ending to a meal that feels like a hug in a bowl. So gather your apples, make the crumble, and get ready to bake a piece of edible happiness.