
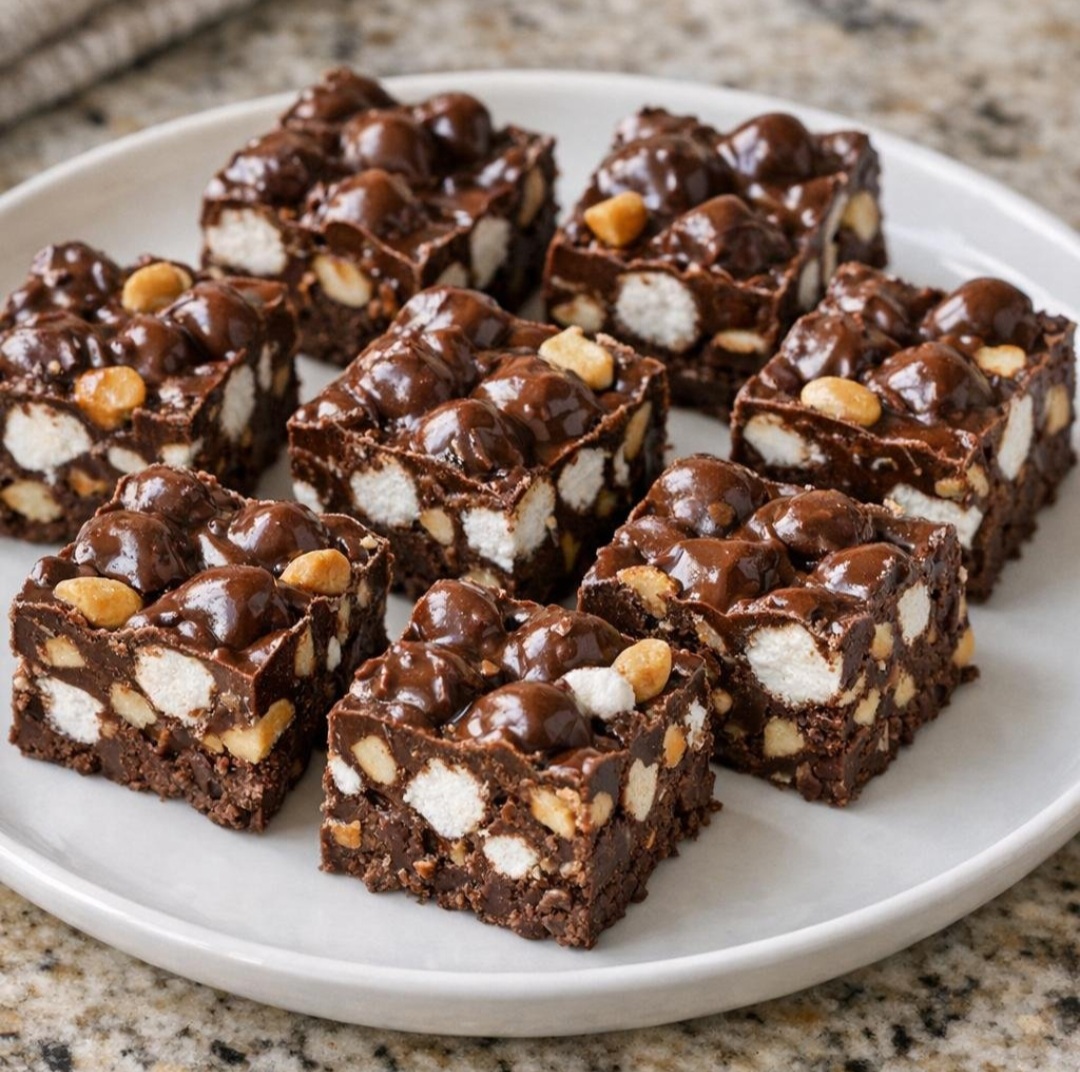
4-Ingredient Rocky Road Fudge – Easy No-Bake Chocolate Candy
Pour sweetened condensed milk over chocolate chips, fold in two simple ingredients, and watch this 4-ingredient Rocky Road Fudge disappear before noon! This easy no-bake chocolate candy is rich, creamy, chewy, and crunchy all at once. With smooth melted chocolate, fluffy mini marshmallows, and salty peanuts in every bite, it delivers the classic rocky road combination that makes homemade candy so hard to resist.
Some recipes earn a permanent place in the family dessert rotation because they are simple to prepare, easy to share, and delicious enough to disappear almost as soon as they hit the table. This easy Rocky Road Fudge recipe checks every box. There is no candy thermometer, no complicated stovetop cooking, and no need to turn on the oven. Just melt, mix, spread, and chill.
Whether you’re preparing treats for a holiday gathering, filling a cookie tray, bringing something sweet to a potluck, or making a weekend dessert for the family, this old-fashioned favorite is a reliable crowd-pleaser. The best part? You only need four ingredients and a little refrigerator time to make a batch of chocolatey goodness.
If you love easy no-bake desserts, homemade chocolate candy, and make-ahead treats that look impressive without requiring hours in the kitchen, this Rocky Road Fudge deserves a place in your recipe collection.
Why You’ll Love This 4-Ingredient Rocky Road Fudge
– Only four ingredients: Chocolate chips, sweetened condensed milk, mini marshmallows, and salted peanuts are all you need.
– No-bake convenience: Everything comes together in the microwave, making this recipe perfect when you want a homemade treat without heating up the kitchen.
– The perfect texture combination: Smooth chocolate fudge surrounds soft, pillowy marshmallows and crunchy peanuts.
– Sweet and salty flavor: The salted peanuts balance the sweetness of the chocolate and condensed milk.
– Perfect for sharing: Cut the chilled fudge into bite-sized squares for dessert trays, holiday parties, bake sales, and family gatherings.
– Make-ahead friendly: Prepare it in advance, let it chill, and cut it into squares when you’re ready to serve.
Ingredients for 4-Ingredient Rocky Road Fudge
You don’t need special candy-making equipment or expensive ingredients to make this delicious homemade fudge. Each ingredient has an important role in creating the rich flavor and signature rocky road texture.
1. Semisweet Chocolate Chips – 3 Cups
Semisweet chocolate chips provide the rich chocolate flavor and form the foundation of this homemade rocky road fudge. Their balanced sweetness prevents the finished candy from becoming overwhelmingly sugary, especially when combined with sweetened condensed milk.
For the smoothest results, choose good-quality chocolate chips that melt evenly. You can also use semisweet chocolate chopped into small, uniform pieces.
2. Sweetened Condensed Milk – 1 Can (14 Ounces)
Sweetened condensed milk gives the fudge its creamy consistency, sweetness, and rich texture. Because it already contains sugar and concentrated milk solids, it helps create a smooth candy without requiring a separate sugar syrup or candy thermometer.
Make sure you use sweetened condensed milk, not evaporated milk. These products are not interchangeable in this recipe because evaporated milk does not contain the same amount of added sugar or provide the same consistency.
3. Mini Marshmallows – 2 Cups
Mini marshmallows give Rocky Road Fudge its classic chewy texture. Their soft, fluffy consistency contrasts beautifully with the smooth chocolate base and crunchy peanuts.
Mini marshmallows are especially convenient because they distribute evenly throughout the mixture. Let the melted chocolate cool briefly before adding them to help prevent them from melting completely into the fudge.
4. Salted Peanuts – 1 Cup
Salted peanuts add a satisfying crunch and a delicious salty contrast to the sweet chocolate and marshmallows. They help give this fudge its signature rocky road character.
Use roasted salted peanuts for a deeper, nuttier flavor. If you prefer larger crunchy pieces, leave the peanuts whole; for smaller bites, roughly chop them before mixing.
Important: If serving this fudge at a gathering, label it clearly because it contains peanuts and may not be suitable for people with peanut allergies.
How to Make Rocky Road Fudge Step by Step
This easy four-ingredient fudge recipe takes only a few minutes of hands-on preparation. The refrigerator does most of the work, allowing the chocolate mixture to set into firm, sliceable squares.
Step 1: Prepare the Pan
Line an 8-inch or 9-inch square baking pan or glass baking dish with parchment paper. Leave a little extra paper hanging over two opposite sides so you can lift the finished fudge out easily.
Lightly smooth the parchment into the corners. This simple preparation makes removing and cutting the fudge much easier once it has chilled.
Step 2: Melt the Chocolate and Condensed Milk
Place the 3 cups of semisweet chocolate chips and the entire 14-ounce can of sweetened condensed milk in a microwave-safe bowl.
Microwave for 30 seconds, then stir thoroughly. Continue heating in 15- to 30-second intervals, stirring after each interval, until the chocolate is almost completely melted and the mixture is smooth.
Avoid overheating the chocolate. Gentle heating helps prevent scorching and keeps the fudge creamy rather than grainy. If a few small chocolate pieces remain, stir the mixture until the residual heat melts them.
Step 3: Let the Chocolate Cool Slightly
Allow the melted chocolate mixture to stand for approximately 2 minutes.
This short resting period is important because extremely hot chocolate can melt the mini marshmallows and affect the texture of the finished candy.
The mixture should remain soft enough to stir but should no longer be piping hot.
Step 4: Fold in the Marshmallows and Peanuts
Add the 2 cups of mini marshmallows and 1 cup of salted peanuts to the chocolate mixture.
Using a sturdy spatula, gently fold everything together until the marshmallows and peanuts are evenly distributed. Work relatively quickly because the chocolate will begin to thicken as it cools.
Try not to overmix. You want visible marshmallow pieces and crunchy peanuts throughout the fudge, not a completely uniform chocolate mixture.
Step 5: Spread the Mixture Into the Pan
Transfer the rocky road mixture to the prepared pan.
Use a spatula to spread it into an even layer, gently pressing the mixture into the corners. Smooth the surface without compacting it too firmly.
For a decorative finish, you can press a few extra mini marshmallows or peanuts onto the top before chilling, although these additions are optional.
Step 6: Chill Until Firm
Place the pan in the refrigerator for 2 to 3 hours, or until the fudge is completely firm.
The chilling time allows the chocolate mixture to set so the candy can be cut into neat squares without losing its shape.
If the center still feels soft, refrigerate it longer before cutting.
Step 7: Cut Into Squares and Serve
Once firm, use the parchment overhang to lift the fudge from the pan and place it on a cutting board.
With a sharp knife, cut the slab into small squares. Wipe the blade clean between cuts for a neater finish.
Arrange the pieces on a serving platter, dessert tray, or airtight container. Your homemade Rocky Road Fudge is ready to share!
Pro Tips for Perfect Rocky Road Fudge
A few simple techniques can make the difference between good fudge and a batch that looks beautiful on a dessert tray.
Use low, gentle heat. Chocolate can scorch when overheated. Short microwave intervals and frequent stirring help it melt smoothly.
Keep water away from the chocolate. Even a small amount of water can interfere with melted chocolate’s texture, so make sure your bowl and spatula are dry.
Cool before adding marshmallows. Let the chocolate mixture rest briefly so the marshmallows retain their shape instead of melting into the chocolate.
Choose the right pan. An 8-inch pan produces thicker pieces, while a 9-inch pan creates a slightly thinner layer. Both work well.
Allow enough chilling time. Cutting the fudge before it is fully set can cause messy edges and soft centers. Refrigerate until firm throughout.
Use a warm, clean knife. For especially neat squares, run a sharp knife under warm water, dry it thoroughly, and cut the fudge. Repeat as needed.
Make it ahead. This fudge is an excellent make-ahead dessert for busy holidays and parties. Prepare it the day before, refrigerate it, and cut it shortly before serving.
Easy Rocky Road Fudge Variations
Once you’ve mastered the basic recipe, you can customize it to suit your family’s tastes while keeping the same simple preparation method.
Swap the Peanuts
Replace the salted peanuts with roasted almonds or salted cashews for a different flavor and crunch. If using unsalted nuts, a small pinch of salt can help preserve the sweet-and-salty balance.
Make a Peanut-Free Version
For anyone who needs to avoid peanuts, prepare a separate batch using a suitable alternative, such as allergy-safe crispy rice cereal, provided it meets their dietary needs. Check all ingredient labels for cross-contact warnings, and never assume other nuts are safe for someone with a peanut allergy.
Add a Festive Finish
For Christmas, sprinkle the top with festive-colored candy pieces or a small amount of crushed peppermint. For Halloween, use seasonal sprinkles. Keep additions modest so the fudge still sets properly.
Try Different Chocolate
You can experiment with dark chocolate for a deeper, less-sweet flavor. White chocolate behaves differently from semisweet chocolate, so substituting it may require adjusting the quantities and method rather than making a direct swap.
Make Smaller Candy Bites
Cut the chilled fudge into small squares for cookie exchanges, lunchbox treats, dessert platters, or homemade edible gifts. Because the flavor is rich, small portions are often all you need.
What to Serve With Rocky Road Fudge
This rich chocolate candy pairs beautifully with simple drinks and lighter desserts.
– Coffee or espresso: The slight bitterness balances the sweet chocolate.
– Cold milk: A classic pairing that makes each bite feel like an old-fashioned chocolate treat.
– Fresh strawberries or raspberries: Their bright, fruity flavor provides a refreshing contrast.
– Vanilla ice cream: Serve a small fudge square alongside a scoop for an easy dessert plate.
– Holiday cookies and brownies: Add the fudge to a mixed dessert tray for parties and family celebrations.
– Hot chocolate: For a cozy winter dessert spread, serve small pieces alongside mugs of hot chocolate.
For a party, arrange the fudge on a platter with fresh fruit and a selection of other bite-sized desserts. Since the squares are rich, cutting them into smaller portions makes them easier for guests to sample alongside other treats.
How to Store Rocky Road Fudge
Refrigerator: Store the fudge in an airtight container in the refrigerator for up to 1 week. Separate layers with parchment or wax paper to keep the squares from sticking together.
Serving: Let the pieces sit at room temperature briefly before serving if you prefer a softer bite. Avoid leaving the fudge out for extended periods, especially in a warm room, because it can soften.
Freezing: For longer storage, wrap the fudge tightly and place it in a freezer-safe airtight container. Freeze for up to 2 months for best quality. Thaw it in the refrigerator while still wrapped to help minimize condensation.
Frequently Asked Questions
Can I make Rocky Road Fudge without a microwave?
Yes. Add the chocolate chips and sweetened condensed milk to a heatproof bowl set over a saucepan of gently simmering water. Stir until smooth, making sure the bottom of the bowl does not touch the water and steam does not enter the chocolate mixture.
Remove the bowl from the heat, let the mixture cool briefly, then fold in the marshmallows and peanuts.
Why didn’t my fudge set properly?
The fudge may need more chilling time, or the chocolate mixture may have been overheated or altered by ingredient substitutions. Refrigerate it longer before cutting. For the most reliable results, measure the ingredients accurately and use semisweet chocolate chips with sweetened condensed milk as directed.
Can I make this fudge the day before a party?
Absolutely! Making it a day ahead is one of the biggest advantages of this recipe. Let it set completely, store it in an airtight container in the refrigerator, and cut it into squares before serving.
Can I use large marshmallows instead of mini marshmallows?
Yes. Cut large marshmallows into smaller pieces so they distribute more evenly throughout the fudge. Mini marshmallows are more convenient, but either option can work.
Is Rocky Road Fudge good for holiday dessert trays?
Definitely. Its rich chocolate color, fluffy marshmallows, and crunchy peanuts make it a welcome addition to Christmas cookie trays, Thanksgiving dessert spreads, potlucks, bake sales, and homemade candy gift boxes.
Final Thoughts: A Simple Homemade Candy Everyone Will Love
This 4-Ingredient Rocky Road Fudge proves that a delicious homemade dessert doesn’t need a long ingredient list or complicated candy-making techniques. With semisweet chocolate chips, sweetened condensed milk, mini marshmallows, and salted peanuts, you can create a rich, chewy, crunchy treat that looks inviting and tastes wonderfully indulgent.
The preparation is straightforward: melt the chocolate, fold in the mix-ins, spread everything into a pan, and refrigerate until firm. There is no oven to preheat and no candy thermometer to monitor, making this an especially convenient recipe for beginners and experienced home cooks alike.
Make a batch for your next family gathering, holiday dessert tray, potluck, or weekend sweet craving. Just remember to save a few pieces before setting the pan on the table.
With its classic rocky road flavor, simple ingredients, and make-ahead convenience, this easy no-bake chocolate fudge is the kind of homemade treat you’ll want to make again and again.