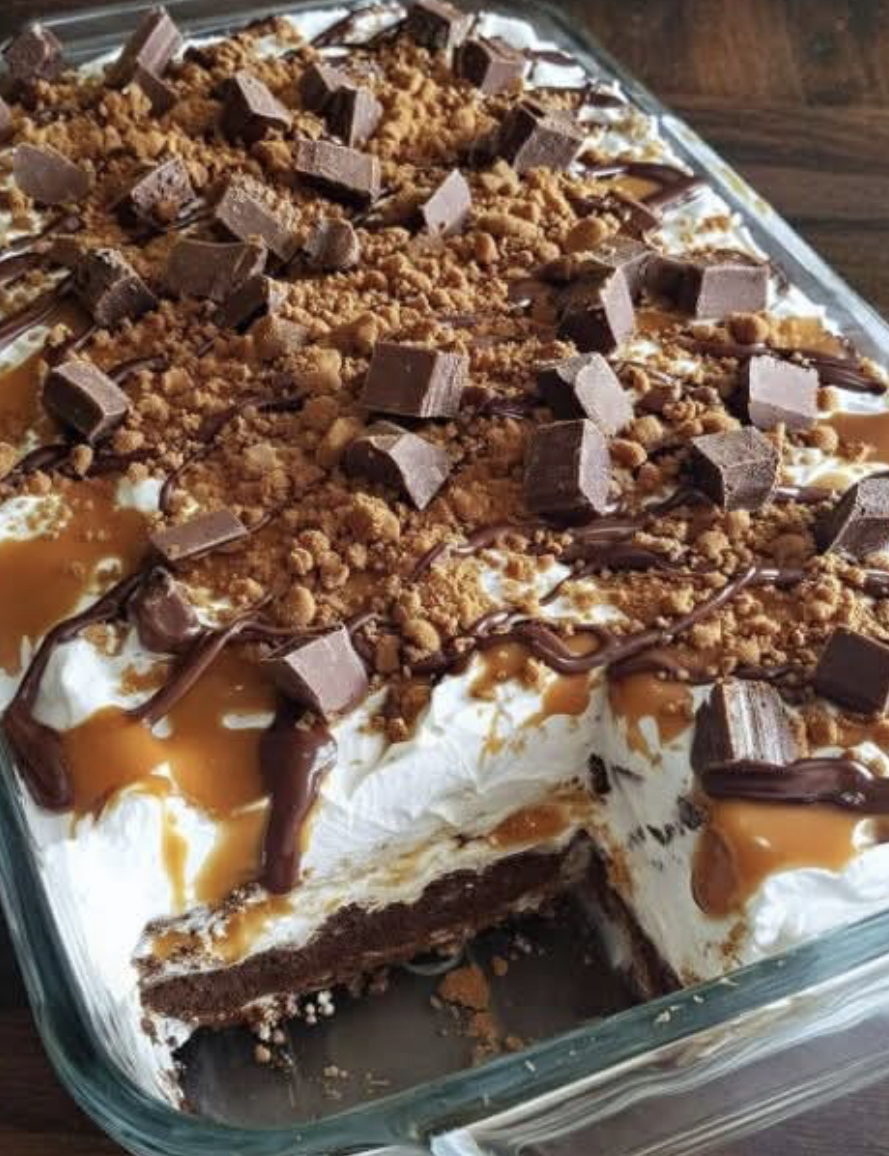
No-bake chocolate caramel icebox cake is the epitome of indulgent, effortless dessert perfection—a towering masterpiece of crisp chocolate wafers softened into tender cake-like layers, enveloped in clouds of whipped cream, drenched in rich caramel sauce, drizzled with chocolate ganache, and crowned with crunchy toffee bits and chocolate candy pieces. This show-stopping treat combines the best elements of a classic icebox cake with the irresistible flavors of a turtle candy or millionaire bar, delivering waves of chocolate, caramel, cream, and crunch in every bite.
Icebox cakes have been beloved since the 1920s and 1930s, when recipes began appearing on boxes of Nabisco Famous Chocolate Wafers. The genius lies in the transformation: thin, crisp wafers absorb moisture from the cream filling overnight in the refrigerator (the original “icebox”), turning into soft, sliceable cake without any baking. This chocolate-caramel version takes the concept to luxurious heights, making it a favorite for holidays, birthdays, potlucks, and summer gatherings when turning on the oven is unthinkable.
What makes this the “ultimate” version is the perfect symphony of textures and flavors: silky whipped cream, gooey homemade or store-bought caramel, bittersweet chocolate drizzle, and the satisfying snap of toffee and chocolate candies on top. The chocolate wafers provide deep cocoa flavor that pairs beautifully with salted caramel, while the cream keeps everything light and balanced. It’s decadent without being cloying, impressive without being fussy.
This dessert feeds a crowd, requires minimal active time, and actually improves with age—make it a day or two ahead for the best texture and flavor melding. It’s endlessly customizable (add nuts, peanut butter, or coffee undertones) yet stunning in its classic form. Kids go wild for the candy topping; adults swoon over the sophisticated layers.
Why This No-Bake Chocolate Caramel Icebox Cake is Irresistible
-
Decadent Flavor Combination:Chocolate + caramel + cream + toffee = pure bliss.
-
Incredible Texture Contrast: Soft cake layers, silky cream, gooey caramel, crunchy topping.
-
Classic Icebox Transformation: Wafers magically become cake overnight.
-
No Oven Needed: Ideal for hot weather or busy schedules.
-
Make-Ahead Champion: Best after 24-48 hours; perfect for entertaining.
-
Crowd-Feeding Size: Serves 12-16 generously.
-
Customizable Luxury: Adjust sweetness, add-ins, and toppings to taste.
-
Stunning Presentation: Beautiful layers revealed with every slice.
Servings: 12-16 | Prep Time: 30-45 minutes | Chill Time: At least 8 hours (24-48 hours optimal)
Ingredients You’ll Need
Quality ingredients elevate this dessert—use the best you can find.
For the Cake Layers:
-
3-4 boxes (9 oz each) Nabisco Famous Chocolate Wafers (about 90-120 wafers; may need extra for breakage)
For the Whipped Cream Filling:
-
4 cups (960ml) heavy whipping cream, very cold
-
½ cup (60g) powdered sugar (adjust to taste)
-
2 teaspoons pure vanilla extract
-
Pinch of salt
-
Optional: 8 oz mascarpone or cream cheese for extra richness and stability
For the Caramel Layer:
-
1½ cups thick caramel sauce(homemade or high-quality store-bought like salted caramel)
-
Optional homemade caramel: 1 cup sugar, 6 tbsp butter, ½ cup heavy cream, 1 tsp salt
For the Chocolate Drizzle:
-
4 oz semisweet or dark chocolate, finely chopped
-
½ cup heavy cream (for ganache)
-
Or use chocolate syrup for a simpler version
For the Crunchy Topping:
-
1 cup crushed chocolate-covered toffee bits (like Heath or Skor)
-
10-15 fun-size chocolate caramel candies (like Twix, Milky Way, or Rolos), chopped
-
Optional: chopped pecans or hazelnuts
Pro tip: If Famous Chocolate Wafers are unavailable (they’re sometimes seasonal), substitute chocolate graham crackers, Oreo thins (scraped), or European chocolate biscuits.
Essential Tools
-
9×13-inch baking dish (glass for pretty presentation)
-
Electric mixer (stand or hand) with chilled bowl
-
Offset spatula or spoon for spreading
-
Microwave-safe bowls
-
Plastic wrap
-
Sharp knife for clean slices
Step-by-Step Instructions
Step 1: Prepare the Whipped Cream
In a large chilled bowl, beat the heavy whipping cream, powdered sugar, vanilla extract, and salt until stiff peaks form. If using mascarpone or cream cheese, beat it separately until smooth, then fold into the whipped cream. Be careful not to overbeat.
Step 2: Prepare the Ganache (if making)
Place the chopped chocolate in a heatproof bowl. Heat the heavy cream until just simmering, then pour over the chocolate. Let sit for 2 minutes, then stir until smooth. Set aside to cool slightly.
Step 3: Assemble the First Layer
Spread a thin layer of whipped cream on the bottom of your 9×13-inch dish. Arrange a single layer of chocolate wafers over the cream, covering as much surface as possible. Break wafers to fill gaps.
Step 4: Add Cream and Caramel
Spread about 1 cup of whipped cream evenly over the wafers. Drizzle generously with caramel sauce.
Step 5: Repeat Layers
Add another layer of wafers, followed by cream and caramel. Repeat until you’ve used all your wafers, ending with a layer of cream on top. You should have 4 to 5 layers total.
Step 6: Top with Ganache and Toppings
Drizzle the chocolate ganache over the top layer of cream. Sprinkle with crushed toffee bits and chopped chocolate caramel candies.
Step 7: Chill
Cover loosely with plastic wrap and refrigerate for at least 8 hours, but preferably 24 to 48 hours. The wafers need time to soften into cake-like layers.
Step 8: Serve
Slice with a sharp knife, wiping clean between cuts. Serve chilled.
Pro Tips for the Perfect Icebox Cake
-
Chill Your Bowl: For the best whipped cream, chill your bowl and beaters in the freezer for 10 to 15 minutes before starting.
-
Don’t Overwhip: Whipped cream should form stiff peaks but still look smooth. Overwhipped cream will become grainy and separate.
-
Layer Evenly: Take time to arrange the wafers in even layers for the cleanest slices.
-
Patience is Key: The wafers need time to soften. Don’t rush the chilling process.
-
Clean Slices: For picture-perfect slices, use a sharp knife and wipe it clean between each cut.
Delicious Variations
-
Salted Caramel: Use salted caramel sauce and add a sprinkle of flaky sea salt on top.
-
Peanut Butter: Add a layer of peanut butter between the cream and caramel.
-
Mocha: Add 1 tablespoon of instant espresso powder to the whipped cream.
-
Nutella: Spread a thin layer of Nutella over each wafer layer.
-
Banana: Add sliced bananas between layers for a banana split vibe.
-
Coconut: Sprinkle toasted coconut over the top along with the toffee bits.
Serving Suggestions
-
Serve with a dollop of fresh whipped cream
-
Pair with a cup of hot coffee or espresso
-
Drizzle individual slices with extra caramel or chocolate sauce
-
Add a sprinkle of flaky sea salt for contrast
Storage
-
Refrigerator: Store covered for up to 4 days. The cake will continue to soften but will remain delicious.
-
Freezer: This cake freezes beautifully for up to 2 months. Wrap tightly in plastic wrap and foil. Thaw overnight in the refrigerator before serving.
Conclusion: A Show-Stopping Dessert Worth Every Bite
This Ultimate No-Bake Chocolate Caramel Icebox Cake is everything a dessert should be—beautiful, decadent, and surprisingly simple. With its layers of soft chocolate wafers, silky whipped cream, gooey caramel, and crunchy toppings, it’s guaranteed to be the star of any gathering.
Whether you’re making it for a holiday, birthday, or just because you’re craving something spectacular, this cake delivers. It’s proof that the most impressive desserts don’t always require an oven.